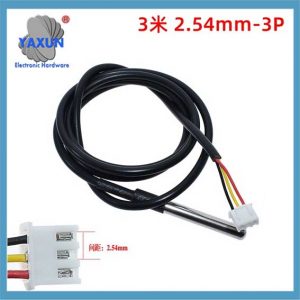
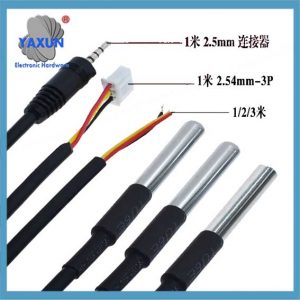
Introducción: Este artículo explica en detalle la aplicación del sensor de temperatura digital DS18B20 personalizado en la construcción de un termómetro digital.. Incluyendo principio de funcionamiento, conexión de hardware, programación de software e implementación de simulación. Proporcionar un diagrama completo de simulación de protues., Código fuente C y análisis de resultados para ayudar a los lectores a comprender y practicar profundamente el uso de DS18B20.
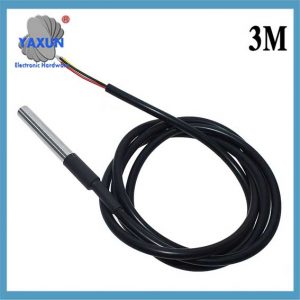
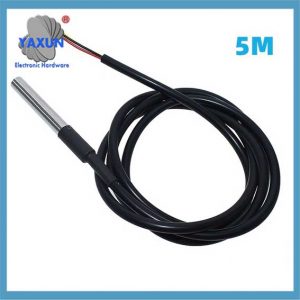
Información de parámetros: fuente de alimentación: 3.0V – 5.5V; Resolución ajustable: 9 – 12 poco; Rango de temperatura: -55 ℃ +125 ℃; Producción : rojo (VCC), amarillo (DATOS), negro (Gnd);
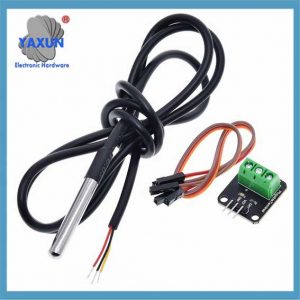
Lo que obtienes: Conseguirás 4 Sensores de temperatura DS18B20, 4 módulos de adaptador y 4 cables de jersey femenino a mujer; El módulo adaptador tiene una resistencia pull-up, que puede ser compatible con Raspberry Pi sin una resistencia externa;
Sensor de temperatura DS18B20: El tamaño de la carcasa de acero inoxidable es aprox.. 6 X 50 mm/ 0.2 X 2 pulgada, y el cable térmico de temperatura digital tiene una longitud total de aprox.. 1 metro/ 39.4 pulgada, que es lo suficientemente largo para satisfacer sus necesidades;
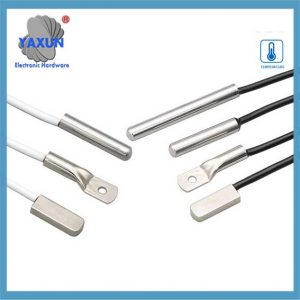
Material de calidad: La sonda está hecha de material de acero inoxidable de calidad., que es impermeable, a prueba de humedad y no fácil de oxidar, para evitar cortocircuitos;
Amplia aplicación: Este sensor de temperatura DS18B20 es compatible con Raspberry Pi, y se aplica ampliamente en la monitorización de la temperatura de la zanja del cable, caldera, qué, invernadero agrícola, habitación limpia, etc..
1. Características del sensor DS18B20
El sensor DS18B20 juega un papel clave en el campo del monitoreo moderno de temperatura. Puede medir la temperatura con alta precisión, y su resolución se puede ajustar según las necesidades, para lograr el monitoreo de la temperatura con diferentes grados de precisión. Además, El pequeño tamaño de DS18B20 lo hace adecuado para su uso en entornos con espacio limitado, y sus características fáciles de usar reducen el umbral técnico de principiantes a profesionales.
Antes de explorar más a fondo los parámetros de rendimiento de DS18B20, Es necesario comprender primero su principio de trabajo. DS18B20 comunica los datos de temperatura a través de señales digitales, que trae conveniencia a la recopilación de datos de temperatura. En comparación con los sensores de temperatura analógica tradicionales, Los sensores digitales como DS18B20 pueden proporcionar lecturas más precisas y son menos sensibles al ruido durante la transmisión de la señal.
Para utilizar completamente estas ventajas de DS18B20, Debemos tener una comprensión profunda de sus parámetros de rendimiento. Estos parámetros incluyen el rango de medición de temperatura, exactitud, resolución, y voltaje de suministro. Estos parámetros no solo determinan si DS18B20 puede satisfacer las necesidades de aplicaciones específicas, pero también afectan el rendimiento y la confiabilidad de todo el sistema.
En este capítulo, En detalle presentaremos los parámetros de rendimiento de DS18B20, Analizar su principio de trabajo, y explorar sus ventajas en diferentes aplicaciones. A través de estos contenidos, Los lectores obtendrán una comprensión más profunda de los sensores DS18B20 y sentarán una base sólida para aplicaciones y programación más complejas posteriores..
2. Explicación detallada del protocolo de comunicación de 1 cable de DS18B20
La razón por la cual los sensores DS18B20 se usan ampliamente se debe en gran medida a su protocolo de comunicación único. – 1-Protocolo de comunicación de cables. Este protocolo simplifica los requisitos para las conexiones de hardware y proporciona una forma eficiente de transmitir datos. Este capítulo analizará profundamente el mecanismo de trabajo y el proceso de intercambio de datos del protocolo de comunicación de 1 línea para sentar una base sólida para la práctica de programación posterior..
2.1 Conceptos básicos del protocolo de comunicación de 1 cable
2.1.1 Características del protocolo de comunicación de 1 alambre:
El protocolo de comunicación DS18B20 1 alambre también se llama “autobús único” tecnología. Tiene las siguientes características: – Comunicación de autobuses individuales: Solo se utiliza una línea de datos para la transmisión de datos bidireccionales, lo que reduce en gran medida la complejidad del cableado en comparación con el método tradicional de comunicación del sensor de múltiples alambres.. – Conexión múltiple: Admite conectar múltiples dispositivos en un bus de datos, e identifica y se comunica a través de códigos de identificación del dispositivo. – Bajo consumo de energía: Durante la comunicación, El dispositivo puede estar en un estado de espera de baja potencia cuando no participa en la comunicación. – Alta precisión: Con un tiempo de transmisión de datos más corto, Puede reducir la interferencia externa y mejorar la precisión de los datos.
2.1.2 Formato de datos y análisis de tiempo de comunicación de 1 alambre
El formato de datos del protocolo de comunicación de 1 cable sigue una regla de tiempo específica. Incluye el tiempo de inicialización, Escribir tiempo y leer el tiempo:
Tiempo de inicialización: El huésped inicia la primera vez el tiempo de detección de presencia (Pulso de presencia) bajando por el autobús por un cierto período de tiempo, y el sensor luego envía un pulso de presencia en respuesta.
Escribir el tiempo: Cuando el anfitrión envía un tiempo de escritura, Primero baja el autobús por aproximadamente 1-15 microsegundos, Luego libera el autobús, y el sensor baja el autobús 60-120 microsegundos para responder.
Leer Tiempo: El host notifica que el sensor envía datos retirando el autobús y liberándolo, y el sensor emitirá la broca de datos en el bus después de un cierto retraso.
3. Método de conexión de hardware del termómetro
La conexión de hardware es el primer y más importante paso para construir un termómetro digital. La conexión correcta entre el sensor DS18B20 y el microcontrolador garantizará una transmisión de datos precisa y proporcionará una base sólida para una programación de software adicional y procesamiento de datos. Este capítulo introducirá en detalle los principios de diseño de la interfaz entre DS18B20 y Microcontroller y los pasos específicos de la conexión del circuito, y cubrir el contenido relevante de la fuente de alimentación y el acondicionamiento de la señal.
3.1 Interfaz entre ds18b20 y microcontrolador
3.1.1 Principios de diseño de circuito de interfaz
El diseño del circuito de interfaz de DS18B20 debe seguir varios principios centrales para garantizar un funcionamiento estable y eficiente del dispositivo:
Fuente de alimentación estable: DS18B20 puede obtener energía de la línea de datos “Dq” (llamado “modo de encendido parásito”), o puede ser alimentado independientemente por una fuente de alimentación externa. Independientemente de qué método se utilice, La fuente de alimentación debe ser estable para evitar errores de transmisión de datos causados por las fluctuaciones de la fuente de alimentación.
Integridad de señal: Dado que DS18B20 transmite datos a través de una sola línea, La integridad de la señal es particularmente crítica. Es necesario considerar la capacidad anti-interferencia de la señal y la coincidencia de las características eléctricas de la señal.
Protección de circuito: Protección contra sobrecorriente y descarga electrostática (ESD) Las medidas de protección deben incluirse en el diseño del circuito para evitar daños en el sensor o microcontrolador.
3.1.2 Pasos específicos para la conexión del circuito
Conectar DS18B20 a un microcontrolador generalmente sigue los siguientes pasos:
Conexión de potencia: Conecte el pin VDD de DS18B20 a una fuente de alimentación de 3.3V o 5V (dependiendo del nivel de voltaje del microcontrolador), y el pasador GND a la línea de campo.
Conexión de línea de datos: El pin DQ está conectado a un pin de E/S digital del microcontrolador. Para garantizar la estabilidad de la transmisión de datos, Se puede agregar una resistencia pull-up entre la línea de datos y la fuente de alimentación, con un valor típico de 4.7kΩ a 10kΩ.
Restablecer y presencia de procesamiento de pin de pulso: Normalmente, el pasador de reinicio (primero) y Press Pulse Pin (PAR) de DS18B20 no necesita conectarse externamente, son señales de uso internamente.
En esta sección, Diseñamos un circuito básico a través del cual el sensor de temperatura DS18B20 se puede conectar a un microcontrolador. El siguiente es un diagrama de circuito de ejemplo basado en Arduino Uno y la descripción correspondiente:
diagrama de flujo LR
DS18B20 — |VDD| 5V
DS18B20 — |Gnd| Gnd
DS18B20 — |Dq| 2
Dq — |Pullado| 5V
Entre ellos, DS18B20 representa el sensor de temperatura digital, 5V es la potencia de salida del microcontrolador, GND es el cable de tierra, y 2 representa el pin de arduino no. 2, que se utiliza para la transmisión de datos. La conexión entre DQ y 5V representa la resistencia pull-up.
3.2 Fuente de alimentación y acondicionamiento de señal
3.2.1 Elección del método de fuente de alimentación
DS18B20 proporciona dos métodos de fuente de alimentación:
Modo de encendido parásito: En este modo, la línea de datos (Dq) No solo puede transmitir datos, pero también alimentar el DS18B20. En este momento, El voltaje de alto nivel en la línea de datos debe ser al menos 3.0 V para garantizar una corriente de fuente de alimentación suficiente. Este modo se usa generalmente cuando la longitud del bus es corta y la transmisión de datos no es demasiado frecuente.
Modo de fuente de alimentación externa: En este modo, DS18B20 tiene una entrada de energía independiente VDD. La alimentación con una fuente de alimentación externa puede mejorar la intensidad de la señal del sensor y mejorar la capacidad anti-interferencia, que es adecuado para la transmisión de larga distancia o la transmisión de datos frecuente.
3.2.2 Filtrado y estabilización de la señal
Para garantizar la estabilidad de la señal y la lectura precisa de los datos, La señal debe filtrarse y estabilizarse correctamente:
Resistencia pull-up: La resistencia de extracción se agrega entre la línea de datos y la fuente de alimentación para garantizar que la línea de datos esté en un estado de alto nivel cuando está inactivo.
Circuito de jitter: Para eliminar lecturas erróneas causadas por interferencia de línea o fluctuaciones de voltaje instantáneas, La señal puede estar enjuicios de software en el lado del microcontrolador.
Protección de ESD: Componentes de protección de ESD (tales como diodos TVS) se agregan a los puertos de sensores y microcontroladores para evitar daños causados por la descarga electrostática.
Esta sección elabora aún más los factores que deben considerarse al seleccionar la fuente de alimentación y el acondicionamiento de la señal en forma de tabla:
| Proyecto | Modo de encendido parásito | Modo de encendido externo | Descripción | | — | — | — | — | | Escenarios aplicables | Líneas cortas, datos infrecuentes | Largas líneas, datos frecuentes | Seleccione de acuerdo con los escenarios de aplicación reales | | Estabilidad de la fuente de alimentación | Más bajo | Más alto | Se recomienda la fuente de alimentación externa para líneas largas o altas frecuencias | | Costo | Más bajo | Más alto | La fuente de alimentación externa requiere componentes adicionales de gestión de energía | | Anti-interferencia | Más débil | Más fuerte | La fuente de alimentación externa es más adecuada para entornos de alta interferencia |
Los métodos de conexión anteriores y las estrategias de procesamiento de señales pueden integrar efectivamente el sensor de temperatura DS18B20 en cualquier sistema de microcontrolador. El próximo capítulo introducirá cómo usar el lenguaje C para:
Práctica de programación funcional de DS18B20:
4. DS18B20 Termómetro digital C Programación del lenguaje
4.1 Fundación de programación y preparación para el entorno
4.1.1 Ideas de diseño de programa y construcción de marco
Antes de comenzar a escribir el programa de idiomas C del termómetro digital DS18B20, Primero necesita establecer las ideas básicas del diseño del programa.. El sensor DS18B20 se comunica con el microcontrolador a través del protocolo de comunicación de 1 cable. Por lo tanto, La tarea principal del programa es implementar las operaciones relacionadas del Protocolo de comunicación de 1 cable., incluida la inicialización de DS18B20, Envío de instrucciones, Datos de temperatura de lectura, y convertir y mostrar los datos de lectura.
El marco del programa se divide aproximadamente en las siguientes partes.:
Inicialización: Inicializar el microcontrolador y el sensor DS18B20.
Bucle principal: Contiene un bucle que lee continuamente los datos del sensor.
1-Biblioteca de funciones de comunicación de cables: Contiene funciones para implementar el protocolo de comunicación de un cable.
Proceso de datos: Convierta los datos sin procesar devueltos por el sensor en valores de temperatura legibles.
Mostrar salida: Muestre los datos de temperatura procesados en la pantalla LCD o los envíe a la computadora a través del puerto serie.
4.1.2 Construcción y configuración del entorno de desarrollo
Para programar y desarrollar el termómetro digital DS18B20, Debe preparar el entorno de desarrollo y configurarlo adecuadamente. Los siguientes son los pasos básicos para el desarrollo:
Seleccione el entorno de desarrollo: Seleccione el entorno de desarrollo integrado apropiado (IDE) Según el tipo de microcontrolador, como para el desarrollo basado en el microcontrolador de la serie Cortex-M de ARM. Puede usar Keil MDK o STM32Cubeide.
Configurar el compilador: Según el IDE utilizado, Configure el compilador para asegurarse de que el código de lenguaje C se pueda compilar correctamente.
Construya la placa de desarrollo de hardware: Seleccione una placa de desarrollo de microcontrolador adecuada, como basado en STM32, ESP32, etc..
Conecte la placa de desarrollo: Conecte el sensor DS18B20 al PIN especificado del microcontrolador a través del protocolo de comunicación de 1 cable.
Código de escritura: Cree un nuevo proyecto de lenguaje C en el código IDE y comience a escribir el código del programa.
Compilar y depurar: Use la herramienta IDE para compilar el código y ejecutarlo en el tablero de desarrollo para la depuración.
#incluir <stdio.h>
// Declaración de la biblioteca de funciones de comunicación de primera línea DS18B20
nulo ds18b20_init();
nulo ds18b20_reset();
vacío DS18B20_Writyte(sin firmar char dat);
un unsigned char ds18b20_readbyte();
int ds18b20_readtemperature();
ent principal() {
// Inicializar el sensor DS18B20
Ds18b20_init();
// Bucle principal
mientras(1) {
// Leer valor de temperatura
int temperation = ds18b20_readtemperatura();
// Valor de temperatura de salida al puerto serie u otro dispositivo de visualización
imprimirf(“Temperatura actual: %d n”, temperatura);
}
devolver 0;
}
4.2 Implementación del programa de lectura de temperatura DS18B20
4.2.1 Construcción de la biblioteca de funciones de comunicación de un cable
Para realizar la lectura de temperatura de DS18B20, Primero necesita construir una biblioteca de funciones de comunicación de un cable. Los siguientes son los métodos de implementación de varias funciones clave.:
Ds18b20_init(): Inicializar el tiempo de comunicación de un cable.
Ds18b20_reset(): Restablecer el sensor y detectar su pulso.
Ds18b20_writyte(sin firmar char dat): Escribe un byte de datos al sensor.
Ds18b20_readbyte(): Lea un byte de datos del sensor.
Ds18b20_readtemperatura(): Lea la temperatura y conviértala.
La implementación de la biblioteca de funciones de comunicación de un cable de DS18B20 es bastante complicada porque requiere un control preciso de los cambios en el nivel de PIN para seguir el protocolo de comunicación de un cable. El siguiente es un ejemplo de implementación de funciones:
nulo ds18b20_reset() {
// Secuencia de reinicio de comunicación de una línea, incluyendo retirar la línea de datos, demora, Liberando el autobús, y detectando el pulso de presencia
// …
}
El propósito de esta función es enviar un pulso de reinicio al DS18B20. Después del reinicio es exitoso, El DS18B20 devolverá un pulso de presencia.
4.2.2 Implementación del algoritmo de lectura de temperatura
Leer el valor de temperatura del sensor DS18B20 es un proceso más complicado, Porque es necesario enviar instrucciones específicas al sensor en un momento determinado y leer los datos devueltos correctamente. El algoritmo para leer el valor de temperatura es el siguiente:
Restablecer el sensor.
Enviar el “buque” dominio (0xCC).
Enviar el “convertir temperatura” dominio (0x44).
Espere a que complete la conversión.
Enviar el “Leer Registro” dominio (0xBE).
Lea dos bytes de datos de temperatura.
El siguiente código muestra cómo leer el valor de temperatura del DS18B20:
int ds18b20_readtemperature() {
Unsigned Char temp_low, TEMP_HIGH;
unsigned int temp;
// Restablecer el sensor y omitir las instrucciones de ROM
Ds18b20_reset();
Ds18b20_writyte(0xCC); // Omitir los comandos ROM
// Enviar comando de temperatura de conversión
Ds18b20_writyte(0x44);
// Espere a que complete la conversión. Aquí debe esperar de acuerdo con el tiempo de conversión de DS18B20
// …
// Restablecer el sensor y leer los datos de temperatura
Ds18b20_reset();
Ds18b20_writyte(0xCC); // Omitir los comandos ROM
Ds18b20_writyte(0xBE); // Leer el comando de registro
// Leer dos bytes de datos
temp_low = ds18b20_readbyte();
temp_high = ds18b20_readbyte();
// Combinar dos bytes de datos en un entero de 16 bits
temp = (TEMP_HIGH << 8) | temp_low;
// Devolver el valor de temperatura, Convertir adecuadamente en función de la resolución del DS18B20
Temperadora de retorno;
}
4.2.3 Depuración del programa y manejo de excepciones
Al escribir un programa de lectura DS18B20, La depuración del programa y el manejo de excepciones son muy importantes. Durante la depuración, Es posible que deba usar el Asistente de depuración del puerto serie para verificar si el valor de la temperatura de salida es correcto, o use un analizador lógico para monitorear el momento de la señal de la comunicación de primera línea. El manejo de excepciones debe tener en cuenta las fallas de hardware, errores de comunicación, y respuestas anormales de DS18B20.
Las siguientes son algunas estrategias de depuración y manejo de excepciones:
Verificación de datos: Después de que cada datos lea, Use una suma de verificación o una broca de verificación para confirmar la corrección de los datos.
Captura de excepción: Agregue un mecanismo de captura de excepción al programa, como un mecanismo de reintento de tiempo de espera, Restablecer el sensor, etc..
Información de depuración: Agregue suficiente salida de información de depuración al programa para ayudar a localizar el problema.
ent principal() {
// Inicializar el sensor DS18B20
Ds18b20_init();
// Bucle principal
mientras(1) {
int temperatura;
// Leer temperatura y verificar los errores
temperatura = ds18b20_readtemperatura();
si (temperatura < 0) {
imprimirf(“Temperatura de lectura de errores!\norte”);
// Puede elegir volver a intentarlo u otros mecanismos de manejo de errores
} demás {
imprimirf(“Temperatura actual: %d n”, temperatura);
}
}
devolver 0;
}
Este capítulo presenta la base de programación de lenguaje C y la preparación del entorno del termómetro digital DS18B20, así como la implementación del programa de lectura de temperatura, y enfatiza la importancia de la depuración del programa y el manejo de excepciones. A través de la introducción de este capítulo, Los lectores deberían poder construir un entorno de desarrollo, Comprender la importancia de la biblioteca de funciones de comunicación de primera línea, y escriba un programa básico de lectura de temperatura. Los siguientes capítulos profundizarán en la construcción y el uso del entorno de simulación Proteus, Proporcionar un método de prueba de simulación para el ensamblaje de hardware real.
5. Diagrama de simulación de proteus y análisis de resultados de simulación
5.1 Construcción del entorno de simulación Proteus
5.1.1 Operación básica del software Proteus
Antes de comenzar a construir el modelo de simulación del termómetro digital DS18B20, Primero debe comprender y dominar la operación básica del software Proteus. Proteus es un potente software de simulación de circuitos electrónico que no solo puede diseñar esquemas de circuitos, pero también diseñar diseños de PCB de circuito y proporcionar funciones de simulación. Aquí hay algunos pasos clave para ayudarlo a comenzar con Proteus:
Abra el software Proteus y cree un nuevo proyecto.
Busque y seleccione los componentes requeridos en la biblioteca de componentes, tales como sensores DS18B20, microcontroladores, fuentes de alimentación, Conectando cables, etc..
Arrastre los componentes seleccionados al área de diseño y use el mouse para colocarlos y diseñarlos.
Use la herramienta de cableado para conectar los pines de cada componente para formar un circuito completo.
Haga doble clic en un componente o cable para modificar sus propiedades, como el valor de resistencia, voltaje de la fuente de alimentación, etc..
Asegúrese de que todos los componentes estén conectados correctamente y verifique los errores u omisiones.
5.1.2 Cree un proyecto de simulación DS18B20
Los pasos para crear un proyecto de simulación para el termómetro digital DS18B20 son los siguientes:
Iniciar proteo y seleccionar “Nuevo proyecto” Para crear un nuevo proyecto.
Después de establecer el nombre y la ubicación del proyecto, hacer clic “Próximo”.
Seleccione una plantilla de proyecto, como “Basado en microprocesador”, y hacer clic “Próximo”.
En el “Artículos de proyecto” pestaña, controlar “Incluir componentes predeterminados” y seleccione un microcontrolador (como la foto, AVR, etc.) y un sensor DS18B20.
Hacer clic “Finalizar” Para completar la creación del proyecto.
Próximo, crear un esquema de circuito:
Seleccione el “Dispositivo de selección” herramienta, Busque y seleccione el sensor Microcontroller y DS18B20 en la biblioteca de componentes.
Usar el “Dispositivo” herramienta para colocar el componente seleccionado en el área de diseño.
Usar el “CABLE” herramienta para conectar el microcontrolador y los pines relevantes del sensor DS18B20.
Después de completar la conexión, usar el “TEXTO” herramienta para agregar anotaciones al diagrama de circuito para una fácil comprensión y modificación.
5.2 Prueba de simulación y análisis de datos
5.2.1 Establecer parámetros y condiciones de simulación
Antes de comenzar la simulación, Debe establecer los parámetros y condiciones para la ejecución de la simulación:
Haga doble clic en el componente Microcontroller para ingresar a la interfaz de configuración de propiedades.
Seleccione la ruta del archivo del programa previamente escrito en “Archivo del programa”.
Establezca los parámetros de la fuente de alimentación para garantizar que tanto el microcontrolador como el sensor DS18B20 tengan el voltaje correcto de la fuente de alimentación.
Próximo, Establezca los parámetros de tiempo para la simulación:
En el panel de control de simulación, seleccionar “Configuración global”.
Ajuste la velocidad de simulación y el tiempo máximo de simulación.
Establezca los puntos de interrupción apropiados para analizar los datos durante el proceso de simulación.
5.2.2 Simular y leer datos de temperatura
Ejecute la simulación y simule los datos de temperatura:
Haga clic en el “Jugar” botón en el panel de control de simulación para iniciar la simulación.
Usar el “DEPURAR” herramienta para ver el programa que ejecuta el estado y los valores variables.
Simule el sensor DS18B20 para leer el valor de temperatura, que generalmente se logra modificando el termómetro virtual en el entorno de simulación.
Para leer datos de temperatura en la simulación, Puede consultar los siguientes pasos:
Encuentre la configuración de simulación de temperatura en las propiedades del componente DS18B20.
Modifique el valor de temperatura para probar la respuesta del sistema en diferentes condiciones de temperatura.
Observe cómo el programa de microcontrolador procesa los datos de temperatura.
5.2.3 Análisis de resultados y solución de problemas
Analice los resultados de la simulación y confirme el rendimiento del termómetro:
Monitorear los datos en la ventana de salida para verificar si la lectura de temperatura es precisa.
Use la herramienta Logic Analyzer para monitorear si el proceso de comunicación de datos es normal.
Verifique si hay señales anormales o salidas inestables.
Realizar un diagnóstico y depuración de fallas:
Si la lectura de temperatura es inexacta o hay un error, Verifique el método de conexión y la configuración del DS18B20.
Analice el código del programa para garantizar que los algoritmos de comunicación y conversión de datos de primera línea se implementen correctamente.
Usar el “Detener” función del software de simulación para detener la simulación y observar el estado actual del sistema.
 English
 العربية
 Български
 粤语
粤语 中文(简体)
 中文(漢字)
 Nederlands
 Suomi
Suomi Français
 Deutsch
 Ελληνικά
 Magyar
 Italiano
 日本語
日本語 한국어
한국어 Polski
 Português
 Română
 Русский
 Slovenščina
 Español
 Svenska
 ภาษาไทย
 Türkçe
 Tiếng Việt

