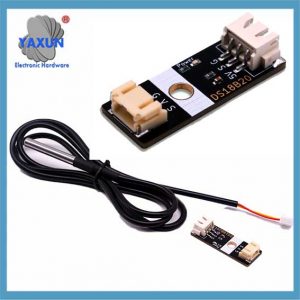
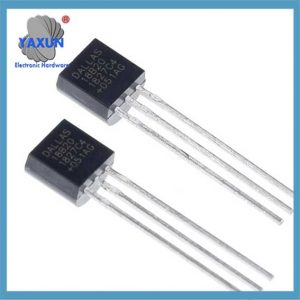
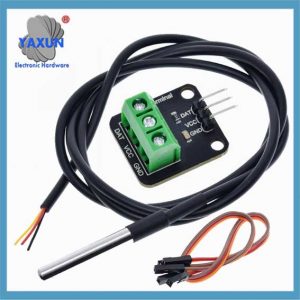
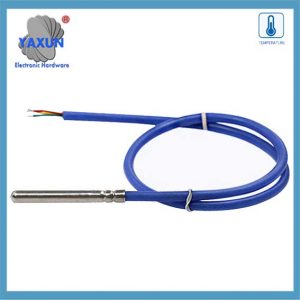
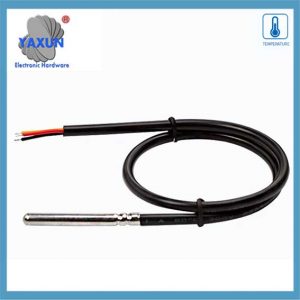
We offer a wide range of the best 1-Wire DS18B20 sensor connectors, including Nanoflex, DisplayPort, USB, Solar, SATA, HDMI, ATA IDE, SAS & many more. All cables are manufactured to the highest industry standards. Using Sensor Circuit Assembly for box builds allows you to focus on your design and marketing, reduce costs, and reap the benefits of our assembly lines, QA processes, and manufacturing expertise.
Senzor DS18B20 komunicira z uporabo “1-Žica” protokol, kar pomeni, da uporablja eno samo podatkovno linijo za vso komunikacijo z mikrokrmilnikom, omogoča povezavo več senzorjev na isto linijo in identifikacijo z njihovo edinstveno 64-bitno serijsko kodo; ta posamezna podatkovna linija je povlečena visoko z uporom in senzor prenaša podatke tako, da potegne črto nizko v določenih časovnih intervalih za pošiljanje bitov informacij.
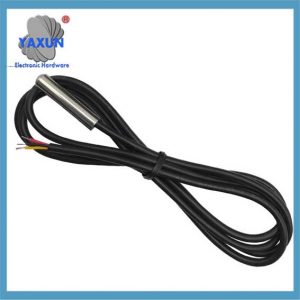
Temperaturni senzor DS18B20: The DS18B20 waterproof probe is designed for underwater use, capable of operating in wet or moist environments without being damaged by water or moisture.
Temperature sensor supply voltage: 3.0V ~ 5.25V;
Območje obratovanja:-55 ℃ do +125 ℃ (-67 ℉ to +257 ℉);
Provides from 9-bit to 12-bit Celsius temperature measurements;
Adapter module is equipped with a pull-up resistor, and directly connects to the GPIO of the Raspberry Pi without an external resistor;
Use this adapter module kit to simplify connecting the waterproof temperature sensor to your project.
1. Key points about the 1-Wire protocol:
Single data line:
Only one wire is needed for communication between the sensor and the microcontroller.
Half-duplex communication:
Data can be sent in both directions, but only one direction at a time.
Parasite power:
The DS18B20 can be powered directly from the data line during communication, eliminating the need for a separate power supply in some cases.
Unique device addresses:
Each DS18B20 sensor has a unique 64-bit serial code that allows the microcontroller to identify and address individual sensors on the bus.
Communication steps with a DS18B20:
1.1 Reset pulse:
The microcontroller initiates communication by pulling the data line low for a specific duration (ponastavite impulz).
1.2 Presence pulse:
If a DS18B20 is present on the bus, it will respond with a short pulse, indicating its presence.
1.3 ROM command:
The microcontroller sends a ROM command to either read the unique 64-bit code of a specific sensor (“Match ROM”) or to address all sensors on the bus (“Ladijska soba”).
1.4 Function command:
Depending on the desired operation (like reading temperature), the microcontroller sends a specific function command to the sensor.
1.5 Data transfer:
Data is transmitted bit-by-bit, with the sensor pulling the data line low to send a ‘0’ and letting the line go high to send a ‘1’.
2. Podrobna razlaga komunikacijskega protokola 1-Wire DS18B20
Razlog za široko uporabo senzorjev DS18B20 je predvsem njegov edinstven komunikacijski protokol – 1-Žični komunikacijski protokol. Ta protokol poenostavlja zahteve za strojne povezave in zagotavlja učinkovit način za prenos podatkov. To poglavje bo poglobljeno analiziralo delovni mehanizem in proces izmenjave podatkov 1-vrstičnega komunikacijskega protokola, da bi postavilo trdne temelje za nadaljnjo prakso programiranja.
2.1 Osnove komunikacijskega protokola 1-Wire
2.1.1 Značilnosti komunikacijskega protokola 1-Wire:
Imenuje se tudi 1-Wire komunikacijski protokol DS18B20 “enojni avtobus” tehnologija. Ima naslednje lastnosti: – Komunikacija z enim vodilom: Za dvosmerni prenos podatkov se uporablja samo ena podatkovna linija, kar močno zmanjša kompleksnost ožičenja v primerjavi s tradicionalno večžično senzorsko komunikacijsko metodo. – Povezava z več napravami: Podpira povezovanje več naprav na eno podatkovno vodilo, ter identificira in komunicira prek identifikacijskih kod naprav. – Nizka poraba energije: Med komunikacijo, naprava je lahko v stanju pripravljenosti z nizko porabo energije, ko ne sodeluje v komunikaciji. – Visoka natančnost: S krajšim časom prenosa podatkov, lahko zmanjša zunanje motnje in izboljša natančnost podatkov.
2.1.2 Format podatkov in časovna analiza 1-žične komunikacije
Format podatkov 1-wire komunikacijskega protokola sledi določenemu časovnemu pravilu. Vključuje čas inicializacije, čas pisanja in čas branja:
Čas inicializacije: Gostitelj najprej zažene merjenje časa zaznavanja prisotnosti (Utrip prisotnosti) z vlečenjem avtobusa za določen čas, in senzor nato v odgovor pošlje impulz prisotnosti.
Napišite čas: Ko gostitelj pošlje čas pisanja, najprej ustavi avtobus za približno 1-15 mikrosekundah, nato sprosti avtobus, in senzor potegne avtobus noter 60-120 mikrosekundah za odgovor.
Preberite čas: Gostitelj obvesti senzor, da pošlje podatke, tako da potegne vodilo navzdol in ga sprosti, in senzor bo po določeni zakasnitvi oddal podatkovni bit na vodilo.
2.2 Software implementation of data communication
2.2.1 Initialization and reset of 1-line communication
At the software level, initialization and reset of 1-Wire communication is the first step of communication. The following is the pseudo code to implement this process:
// OneWire communication initialization function
void OneWire_Init() {
// Set the bus to input mode and enable the pull-up resistor
SetPinMode(DS18B20_PIN, INPUT_PULLUP);
// Wait for the bus to be idle
DelayMicroseconds(1);
// Send a reset pulse
OneWire_Reset();
}
// OneWire communication reset function
void OneWire_Reset() {
// Pull down the bus
SetPinMode(DS18B20_PIN, OUTPUT_LOW);
DelayMicroseconds(480);
// Release the bus
SetPinMode(DS18B20_PIN, INPUT_PULLUP);
DelayMicroseconds(70);
// Wait for the presence of a pulse
če (!WaitForOneWirePresence())
// No pulse was detected, maybe the sensor is not connected or the initialization failed
HandleError();
DelayMicroseconds(410);
}
// Waiting for the presence of a pulse
bool WaitForOneWirePresence() {
return ReadPin(DS18B20_PIN) == 0; // Assume low level is a signal presence
}
2.2.2 Data reading and writing operations
Data reading and writing operations are the core part of sensor communication. The following code shows how to write a byte to a one-wire bus:
// Write a byte to a one-wire bus
void OneWire_WriteByte(byte data) {
za (int i = 0; i < 8; i ++) {
OneWire_WriteBit(podatke & 0x01);
podatke >>= 1;
}
}
// Write a bit to a one-wire bus
void OneWire_WriteBit(bit data) {
SetPinMode(DS18B20_PIN, OUTPUT_LOW);
če (podatke) {
// Release the bus when writing 1
SetPinMode(DS18B20_PIN, INPUT_PULLUP);
DelayMicroseconds(1);
} drugače {
// Continue to pull the bus low when writing 0
DelayMicroseconds(60);
}
SetPinMode(DS18B20_PIN, INPUT_PULLUP);
DelayMicroseconds(1);
}
Next is the function to read a byte:
// Read a byte from the one-wire bus
byte OneWire_ReadByte() {
byte data = 0;
za (int i = 0; i < 8; i ++) {
podatke >>= 1;
če (OneWire_ReadBit())
podatke |= 0x80;
}
return data;
}
// Read a bit from the one-wire bus
bit OneWire_ReadBit() {
SetPinMode(DS18B20_PIN, OUTPUT_LOW);
SetPinMode(DS18B20_PIN, INPUT_PULLUP);
DelayMicroseconds(3);
bool result = ReadPin(DS18B20_PIN);
DelayMicroseconds(57);
return result;
}
2.2.3 Verification mechanism of OneWire communication
The OneWire communication protocol uses a simple verification mechanism in the data exchange process, usually by reading back the written data to verify the correctness of the data. The following is a sample code for verifying the written data:
byte data = 0x55; // Assume that the data to be sent
OneWire_WriteByte(podatke); // Write data to the OneWire bus
byte readData = OneWire_ReadByte(); // Read back data from the OneWire bus
če (readData != data) {
HandleError(); // If the read-back data does not match the written data, handle the error
 English
 Afrikaans
 العربية
 বাংলা
বাংলা bosanski jezik
 Български
 Català
 粤语
粤语 中文(简体)
 中文(漢字)
 Hrvatski
 Čeština
 Nederlands
 Eesti keel
 Suomi
Suomi Français
 Deutsch
 Ελληνικά
 हिन्दी; हिंदी
 Magyar
 Bahasa Indonesia
 Italiano
 日本語
日本語 한국어
한국어 Latviešu valoda
 Lietuvių kalba
 македонски јазик
 Bahasa Melayu
 Norsk
Norsk پارسی
پارسی Polski
 Português
 Română
 Русский
 Cрпски језик
 Slovenčina
 Slovenščina
 Español
 Svenska
 ภาษาไทย
 Türkçe
 Українська
 اردو
اردو Tiếng Việt

