 English
 Afrikaans
 العربية
 বাংলা
বাংলা bosanski jezik
 Български
 Català
 粤语
粤语 中文(简体)
 中文(漢字)
 Hrvatski
 Čeština
 Nederlands
 Eesti keel
 Suomi
Suomi Français
 Deutsch
 Ελληνικά
 हिन्दी; हिंदी
 Magyar
 Bahasa Indonesia
 Italiano
 日本語
日本語 한국어
한국어 Latviešu valoda
 Lietuvių kalba
 македонски јазик
 Bahasa Melayu
 Norsk
Norsk پارسی
پارسی Polski
 Português
 Română
 Русский
 Cрпски језик
 Slovenčina
 Slovenščina
 Español
 Svenska
 ภาษาไทย
 Türkçe
 Українська
 اردو
اردو Tiếng Việt
Chúng tôi cung cấp nhiều loại đầu nối cảm biến DS18B20 1 dây tốt nhất, bao gồm cả Nanoflex, DisplayPort, USB, Mặt trời, SATA, HDMI, ĐÓ LÀ Ý TƯỞNG, SAS & nhiều hơn nữa. Tất cả các loại cáp được sản xuất theo tiêu chuẩn công nghiệp cao nhất. Việc sử dụng Bộ mạch cảm biến để chế tạo hộp cho phép bạn tập trung vào thiết kế và tiếp thị của mình, giảm chi phí, và gặt hái những lợi ích từ dây chuyền lắp ráp của chúng tôi, quy trình đảm bảo chất lượng, và chuyên môn sản xuất.
Cảm biến DS18B20 giao tiếp bằng cách sử dụng “1-Dây điện” giao thức, có nghĩa là nó sử dụng một dòng dữ liệu duy nhất cho tất cả các giao tiếp với bộ vi điều khiển, cho phép nhiều cảm biến được kết nối trên cùng một dòng và được xác định bằng mã nối tiếp 64 bit duy nhất của chúng; Đường dữ liệu đơn này được kéo lên cao bằng một điện trở và cảm biến truyền dữ liệu bằng cách kéo đường dây xuống thấp trong các khoảng thời gian cụ thể để gửi các bit thông tin.
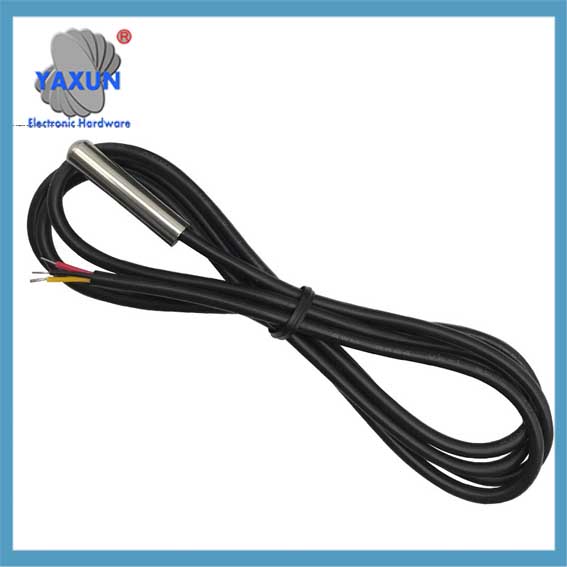
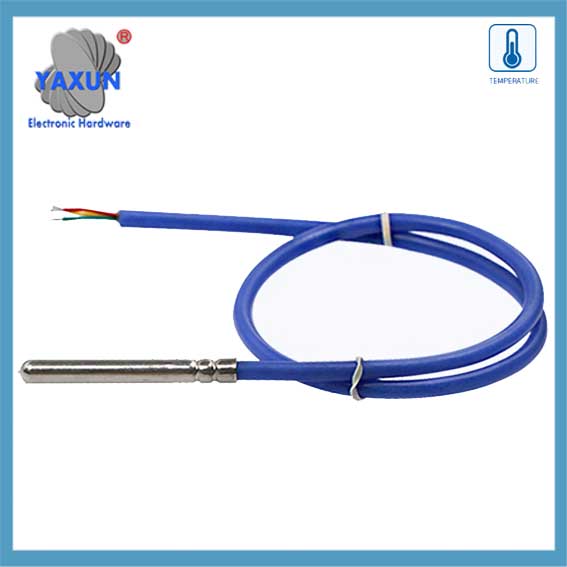
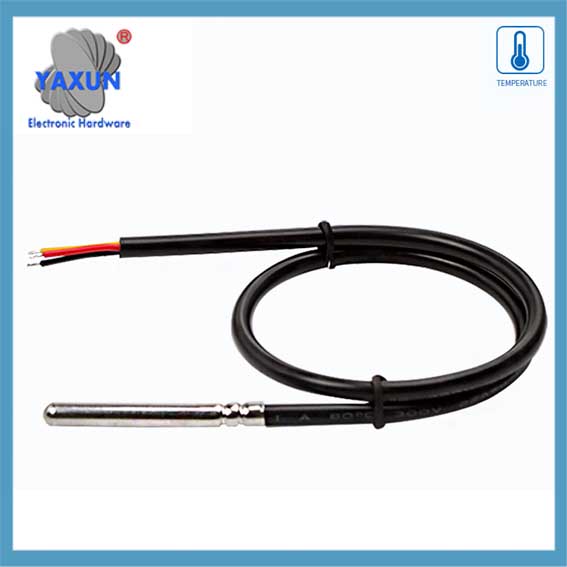
Cảm biến nhiệt độ DS18B20: Đầu dò chống nước DS18B20 được thiết kế để sử dụng dưới nước, có khả năng hoạt động trong môi trường ẩm ướt mà không bị hư hỏng do nước hoặc hơi ẩm.
Điện áp cung cấp cảm biến nhiệt độ: 3.0V ~ 5,25V;
Phạm vi nhiệt độ hoạt động:-55 ℃ to +125 oC (-67 ℉ đến +257 ℉);
Cung cấp các phép đo nhiệt độ từ 9 bit đến 12 bit độ C;
Mô-đun bộ chuyển đổi được trang bị điện trở kéo lên, và kết nối trực tiếp với GPIO của Raspberry Pi mà không cần điện trở bên ngoài;
Sử dụng bộ mô-đun bộ chuyển đổi này để đơn giản hóa việc kết nối cảm biến nhiệt độ chống nước với dự án của bạn.
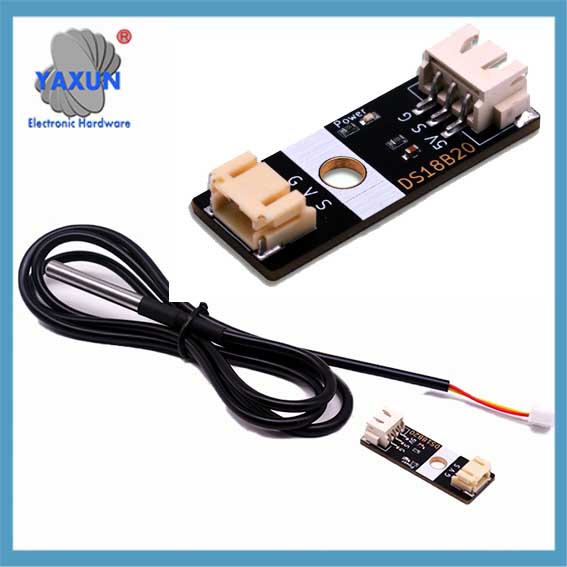 Đầu dò cảm biến nhiệt độ kỹ thuật số DS18B20 & Mô-đun XH2.54 đến PH2.0 |
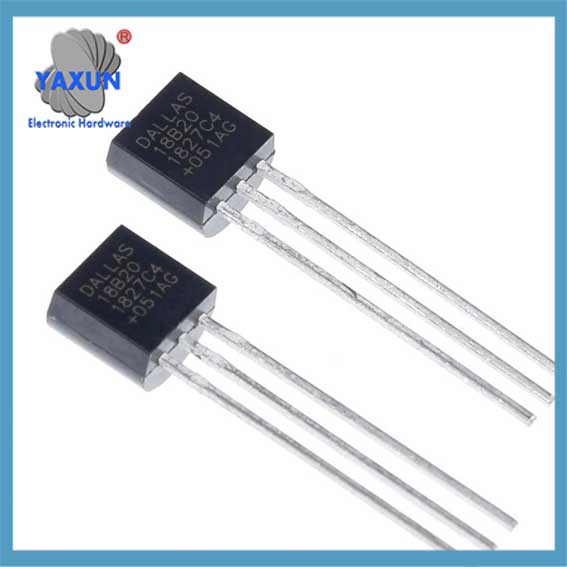 Cảm biến nhiệt độ chip DS18B20 do Trung Quốc sản xuất Cảm biến nhiệt độ TO-92 |
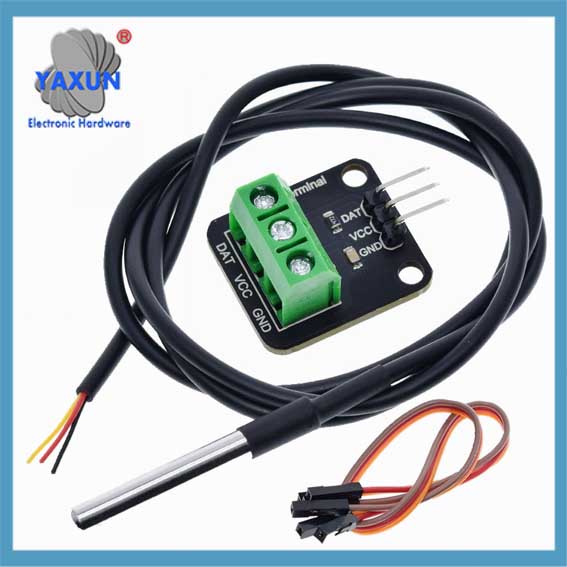 Cảm biến nhiệt độ DS18B20 Cáp chống nước 1 dây + bộ bảng chuyển đổi |
1. Những điểm chính về giao thức 1-Wire:
Dòng dữ liệu đơn:
Chỉ cần một dây để liên lạc giữa cảm biến và vi điều khiển.
Giao tiếp bán song công:
Dữ liệu có thể được gửi theo cả hai hướng, nhưng tại một thời điểm chỉ có một hướng.
Sức mạnh ký sinh:
DS18B20 có thể được cấp nguồn trực tiếp từ đường dữ liệu trong quá trình liên lạc, loại bỏ sự cần thiết phải có nguồn điện riêng trong một số trường hợp.
Địa chỉ thiết bị duy nhất:
Mỗi cảm biến DS18B20 có một mã nối tiếp 64 bit duy nhất cho phép bộ vi điều khiển xác định và xử lý các cảm biến riêng lẻ trên xe buýt.
Các bước giao tiếp với DS18B20:
1.1 Đặt lại xung:
Bộ vi điều khiển bắt đầu giao tiếp bằng cách kéo đường truyền dữ liệu xuống mức thấp trong một khoảng thời gian cụ thể (Đặt lại xung).
1.2 Xung hiện diện:
Nếu có DS18B20 trên xe buýt, nó sẽ phản hồi bằng một xung ngắn, cho thấy sự hiện diện của nó.
1.3 Lệnh ROM:
Bộ vi điều khiển gửi lệnh ROM để đọc mã 64 bit duy nhất của một cảm biến cụ thể (“ROM trận đấu”) hoặc để giải quyết tất cả các cảm biến trên xe buýt (“Phòng tàu”).
1.4 Lệnh chức năng:
Tùy theo hoạt động mong muốn (như đọc nhiệt độ), bộ vi điều khiển gửi một lệnh chức năng cụ thể đến cảm biến.
1.5 Truyền dữ liệu:
Dữ liệu được truyền từng bit, với cảm biến kéo đường dữ liệu xuống thấp để gửi một ‘0’ và để đường dây lên cao để gửi số '1'.
2. Giải thích chi tiết về giao thức truyền thông 1 dây DS18B20
Lý do tại sao các cảm biến DS18B20 được sử dụng rộng rãi phần lớn là do giao thức truyền thông độc đáo của nó – 1-Giao thức giao tiếp dây. Giao thức này đơn giản hóa các yêu cầu cho các kết nối phần cứng và cung cấp một cách hiệu quả để truyền dữ liệu. Chương này sẽ phân tích sâu sắc cơ chế làm việc và quá trình trao đổi dữ liệu của giao thức truyền thông 1 dòng để đặt nền tảng vững chắc cho thực tiễn lập trình tiếp theo.
2.1 Khái niệm cơ bản về giao thức giao tiếp 1 dây
2.1.1 Các tính năng của giao thức giao tiếp 1 dây:
Giao thức giao tiếp DS18B20 1 dây cũng được gọi “Xe buýt đơn” công nghệ. Nó có các tính năng sau: – Giao tiếp xe buýt đơn: Chỉ có một dòng dữ liệu được sử dụng để truyền dữ liệu hai chiều, làm giảm đáng kể sự phức tạp của hệ thống dây điện so với phương pháp giao tiếp cảm biến đa dây truyền thống. – Kết nối nhiều thiết bị: Hỗ trợ kết nối nhiều thiết bị trên một bus dữ liệu, và xác định và giao tiếp thông qua mã nhận dạng thiết bị. – Tiêu thụ năng lượng thấp: Trong quá trình giao tiếp, Thiết bị có thể ở trạng thái chờ công suất thấp khi không tham gia giao tiếp. – Độ chính xác cao: Với thời gian truyền dữ liệu ngắn hơn, Nó có thể giảm nhiễu bên ngoài và cải thiện độ chính xác của dữ liệu.
2.1.2 Định dạng dữ liệu và phân tích thời gian của giao tiếp 1 dây
Định dạng dữ liệu của giao thức giao tiếp 1 dây tuân theo một quy tắc thời gian cụ thể. Nó bao gồm thời gian khởi tạo, Viết thời gian và đọc thời gian:
Thời gian khởi tạo: Máy chủ trước tiên bắt đầu thời gian phát hiện sự hiện diện (Xung hiện diện) bằng cách kéo xe buýt xuống trong một khoảng thời gian nhất định, và cảm biến sau đó gửi xung hiện diện để đáp ứng.
Viết thời gian: Khi máy chủ gửi thời gian ghi, đầu tiên nó kéo xe buýt xuống khoảng 1-15 micro giây, Sau đó phát hành xe buýt, và cảm biến kéo xe buýt xuống 60-120 micro giây để trả lời.
Đọc thời gian: Máy chủ thông báo cho cảm biến để gửi dữ liệu bằng cách kéo xe buýt xuống và phát hành nó, và cảm biến sẽ xuất bit dữ liệu trên xe buýt sau một sự chậm trễ nhất định.
 Thiết Bị Analog DS18B20+, Nhiệt kế kỹ thuật số 1 dây có độ phân giải có thể lập trình MAXIM |
 DS18B20 Cảm biến nhiệt độ kỹ thuật số 1 dây 12-bit w/ 1 Cáp đồng hồ |
 Đầu dò cảm biến DS18B20 chuyên dụng để thu thập nhiệt độ và độ ẩm trong kho lạnh dây chuyền lạnh |
2.2 Phần mềm triển khai truyền thông dữ liệu
2.2.1 Khởi tạo và thiết lập lại giao tiếp 1 dòng
Ở cấp độ phần mềm, khởi tạo và thiết lập lại giao tiếp 1-Dây là bước đầu tiên của giao tiếp. Sau đây là mã giả để thực hiện quá trình này:
// Chức năng khởi tạo giao tiếp OneWire
vô hiệu OneWire_Init() {
// Đặt bus ở chế độ đầu vào và bật điện trở kéo lên
SetPinMode(DS18B20_PIN, INPUT_PULLUP);
// Đợi xe buýt nhàn rỗi
Độ trễ micro giây(1);
// Gửi xung đặt lại
OneWire_Reset();
}
// Chức năng thiết lập lại giao tiếp OneWire
vô hiệu hóa OneWire_Reset() {
// Kéo xe buýt xuống
SetPinMode(DS18B20_PIN, OUTPUT_LOW);
Độ trễ micro giây(480);
// Thả xe buýt
SetPinMode(DS18B20_PIN, INPUT_PULLUP);
Độ trễ micro giây(70);
// Chờ sự hiện diện của xung
nếu như (!WaitForOneWirePresence())
// Không có xung được phát hiện, có thể cảm biến chưa được kết nối hoặc quá trình khởi tạo không thành công
Xử lýLỗi();
Độ trễ micro giây(410);
}
// Chờ đợi sự hiện diện của xung
bool WaitForOneWirePresence() {
trả về ReadPin(DS18B20_PIN) == 0; // Giả sử mức thấp là sự hiện diện của tín hiệu
}
2.2.2 Hoạt động đọc và ghi dữ liệu
Hoạt động đọc và ghi dữ liệu là phần cốt lõi của giao tiếp cảm biến. Đoạn mã sau đây cho thấy cách ghi một byte vào bus một dây:
// Viết một byte lên bus một dây
làm mất hiệu lực OneWire_WriteByte(dữ liệu byte) {
vì (int tôi = 0; Tôi < 8; i ++) {
OneWire_WriteBit(dữ liệu & 0x01);
dữ liệu >>= 1;
}
}
// Viết một chút lên xe buýt một dây
làm mất hiệu lực OneWire_WriteBit(dữ liệu bit) {
SetPinMode(DS18B20_PIN, OUTPUT_LOW);
nếu như (dữ liệu) {
// Nhả bus khi viết 1
SetPinMode(DS18B20_PIN, INPUT_PULLUP);
Độ trễ micro giây(1);
} khác {
// Tiếp tục kéo xe buýt xuống thấp khi viết 0
Độ trễ micro giây(60);
}
SetPinMode(DS18B20_PIN, INPUT_PULLUP);
Độ trễ micro giây(1);
}
Tiếp theo là chức năng đọc byte:
// Đọc một byte từ bus một dây
byte OneWire_ReadByte() {
dữ liệu byte = 0;
vì (int tôi = 0; Tôi < 8; i ++) {
dữ liệu >>= 1;
nếu như (OneWire_ReadBit())
dữ liệu |= 0x80;
}
Trả về dữ liệu;
}
// Đọc một chút từ bus một dây
bit OneWire_ReadBit() {
SetPinMode(DS18B20_PIN, OUTPUT_LOW);
SetPinMode(DS18B20_PIN, INPUT_PULLUP);
Độ trễ micro giây(3);
kết quả bool = ReadPin(DS18B20_PIN);
Độ trễ micro giây(57);
kết quả trả về;
}
2.2.3 Cơ chế xác minh giao tiếp OneWire
Giao thức truyền thông OneWire sử dụng cơ chế xác minh đơn giản trong quá trình trao đổi dữ liệu, thường bằng cách đọc lại dữ liệu được ghi để xác minh tính chính xác của dữ liệu. Sau đây là mã mẫu để xác minh dữ liệu bằng văn bản:
dữ liệu byte = 0x55; // Giả sử dữ liệu được gửi
OneWire_WriteByte(dữ liệu); // Ghi dữ liệu lên bus OneWire
byte readData = OneWire_ReadByte(); // Đọc lại dữ liệu từ bus OneWire
nếu như (đọc dữ liệu != dữ liệu) {
Xử lýLỗi(); // Nếu dữ liệu đọc lại không khớp với dữ liệu được ghi, xử lý lỗi